VSFX 708 - Modeling for Visual Effects
CG Vehicle Model - 1957 Sunbeam S7 500
-- Featured in the July 2010 issues of Computer Graphics World
and Post Magazine! --
Project Summary:
Model a hard surface object, typically a vehicle, in Maya. For the first part of the project it is to be lit with standard Maya techniques, part 2 uses HDR lighting.
Results:
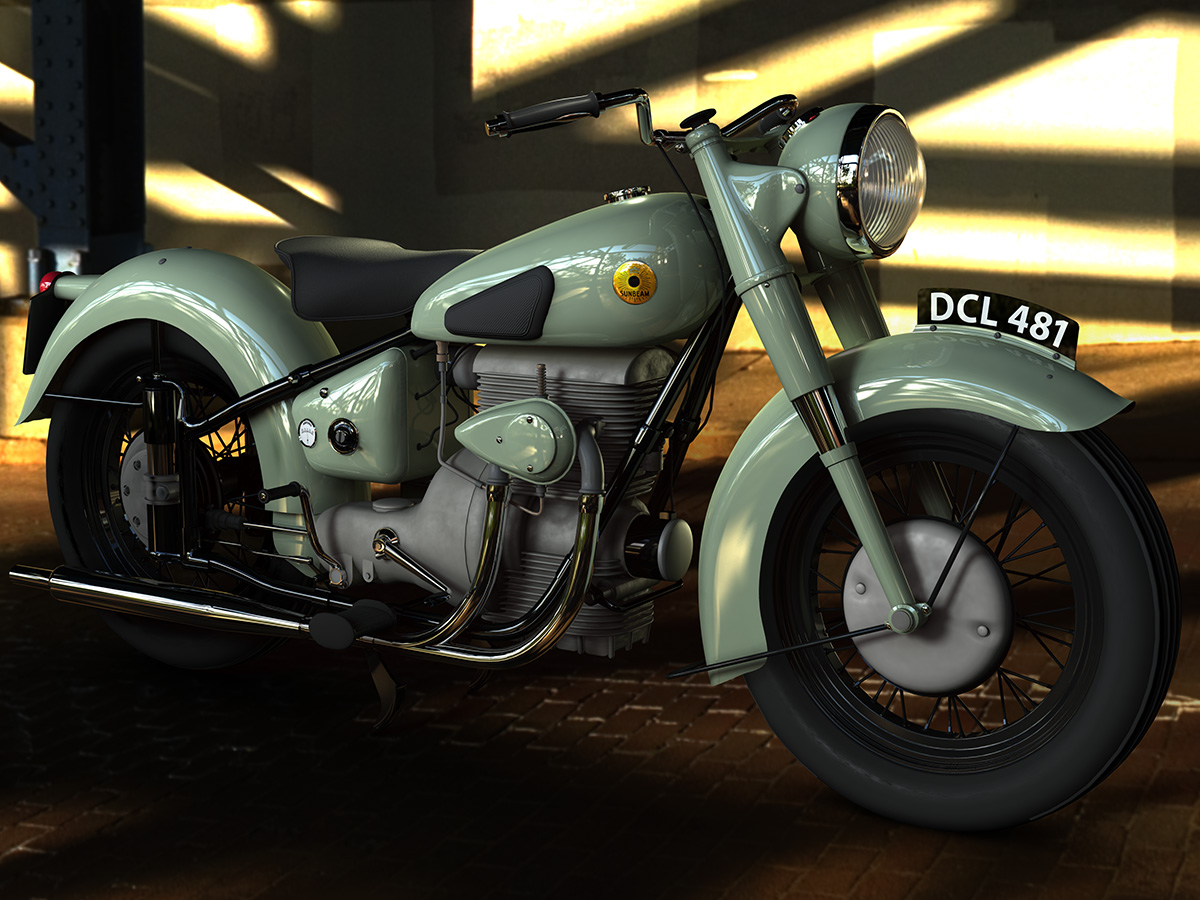
Click on the image to the right to see the final HDR render.
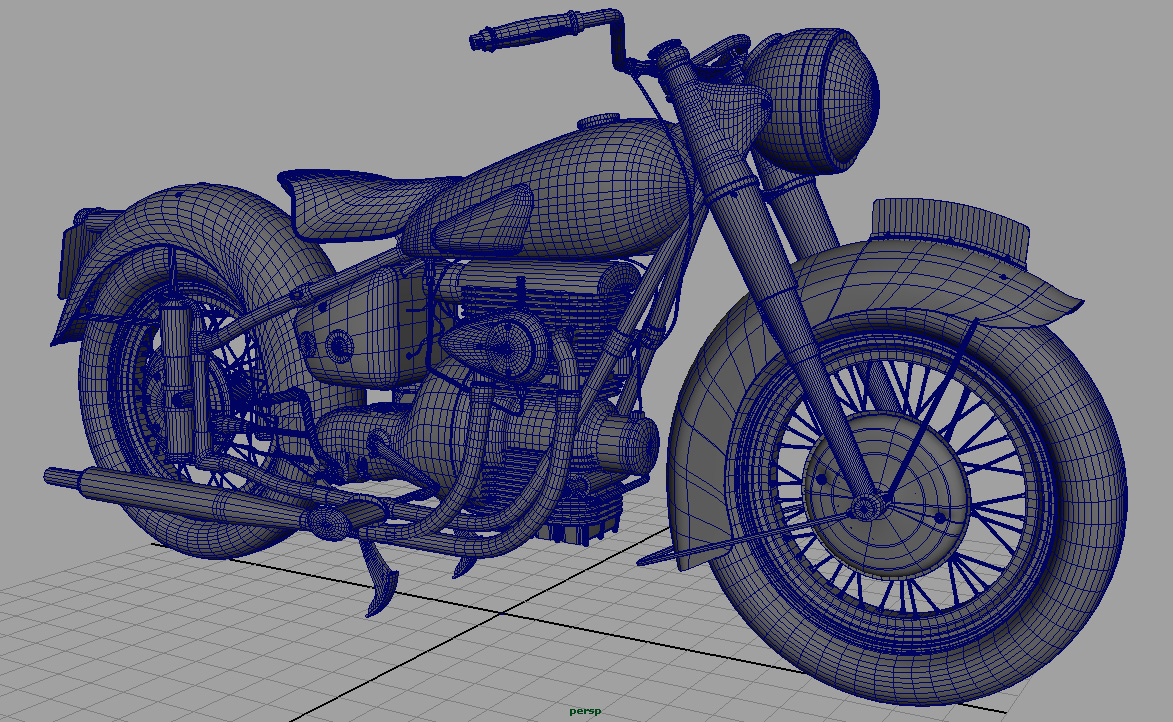
Wireframe
I used a combination of polygonal and NURBS modeling with most of the model being converted to polys for final texturing and rendering. The final poly count is around 135K faces. Accuracy is as close as I can make it without having factory blueprints. My reference photos were largely snapshots that people had taken of their own bikes from various angles so orthographic views were in short supply. I'm sure there are some Sunbeam experts out there that will roast me on the subtleties but dealing with so many different bikes as sources meant that I was referencing models from various years in various trims and in various states of repaired/replaced parts. I selected one studio image as my "hero" bike and used it as a guide for year- or trim-specific bits. There are still some fittings and bolts and wires missing but it is largely complete.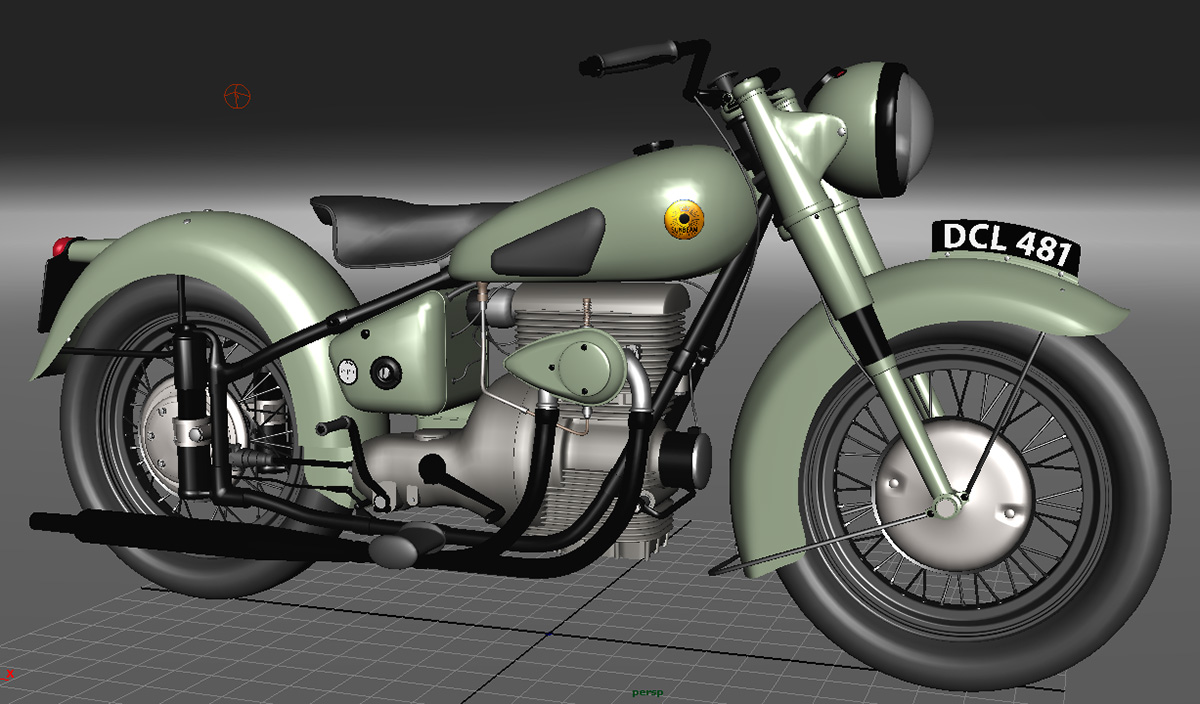
Shading and Texture
Other than the badge, gauge faces, and license plate, the majority of the textures on the bike are procedural. I am considering going back to redo the engine and transmission as a file texture because I couldn't get the fine control I prefer as procedurals. The license plate has a copy of it's map plugged into the incandescence to keep the letters looking white and mimic the reflective paint typically used. The headlight presented an interesting challenge in replicating the grooves found in older fresnel lenses. I plugged a repeating black-to-white ramp into the refractive index on the glass shader to achieve the ridges and proper bending of reflections, both from within the light and coming thru from the far side. I added some reflection blur to the paint shader to replicate the enamel finishes originally used to paint these bikes.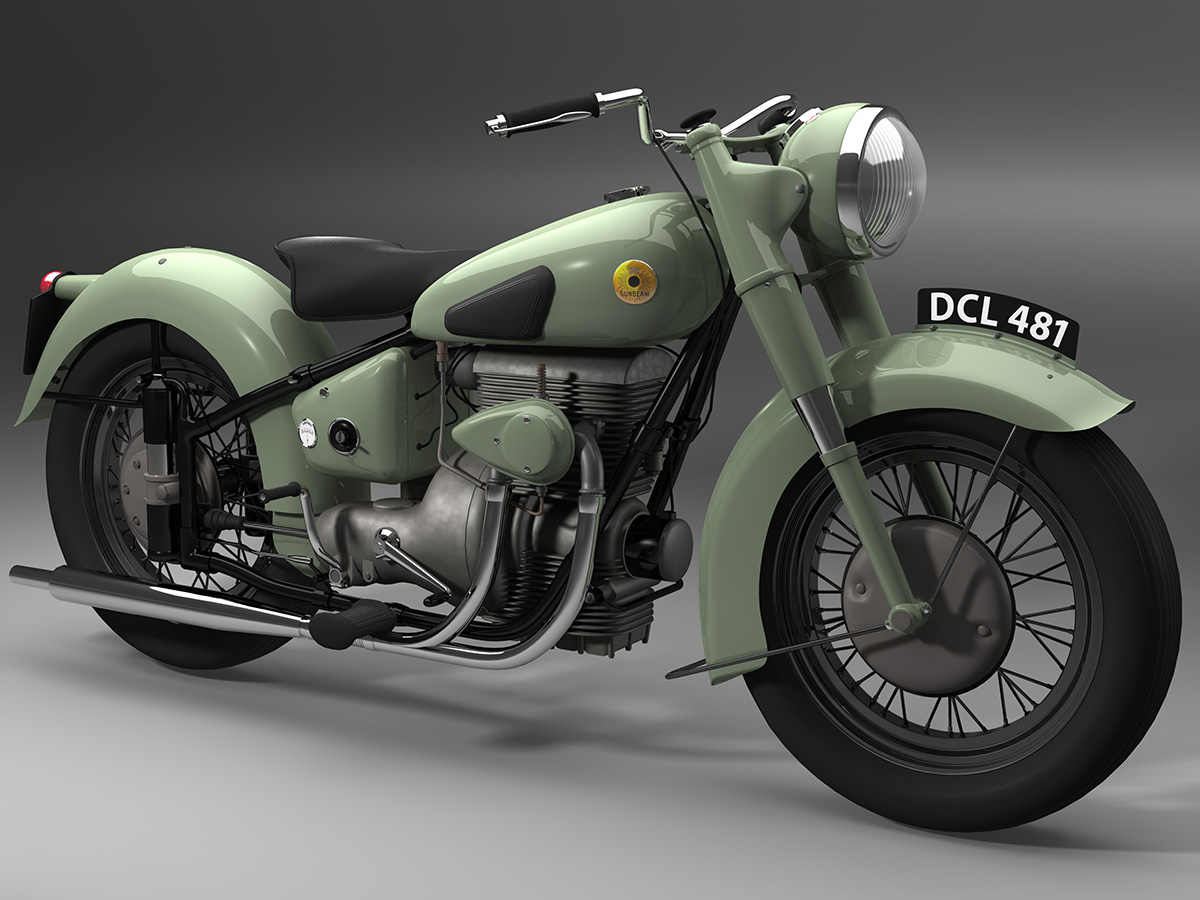
Lighting - Standard
For the maya lighting I pulled from my experience in studio photography and mimicked a typical studio setup. The bike is placed in a flattened "eggshell" studio for clean reflections. A large Final Gather panel over the top of the bike acted as my softbox. A single spot on the front side of the bike across from camera filled in my specular highlights. A lower spot acted as a fill for the front tire and engine. A third spot from above and behind the bike, opposite camera, served as a rim fill for the seat and tank top. Click for a 4-view of the scene setup.
Lighting - HDR
This is the first time I have used image-based lighting. I found a pretty suitable HDR at crazy8studio.com which turned out to be the site of a SCAD grad. That provided a good initial pass but it was still too dark and undefined. I added a shaped Final Gather panel just outside the HDR sphere to reinforce the area that was casting the most light in the image. That was a big step but I also added two spots behind the bike to augment the strong bounce light coming from the rear wall. Several other fills, rims, and spec lights rounded out the group. It should also be noted that I added a negative light on the rear tire area to darken it down and sit it on the dark section of the image. I added a ground plane under the bike with the Use Background shader so that I could still cast shadows and render occlusion properly. One light on its own render layer acted as the shadow casting spot and was rendered as a separate pass. That, along with an occlusion pass, was comped in with Photoshop. Click for a 4-view of the scene setup. Click for shots of the three passes.
©Copyright 2009-Present David Lewis. All Rights Reserved. No images may be used or reproduced without express written permission.
Home • Reel & Resume • SCAD • Professional • Personal • Contact